|
...Continued from Page 17.
New to ProntoProEdit NG is the ability to have more than one line of text on a button, and to adjust vertical and horizontal centering. First, a nearly unlimited number of lines of text can be placed on a button or panel – however lines that can’t physically fit will simply disappear. Font sizes and colors cannot be mixed and matched, so all text on a button will appear the same. In addition I would prefer the line spacing be compressed slightly, since it’s difficult to get two lines of text to fit on most buttons acceptably. Finally, the horizontal and vertical centering can be changed to left/center/right and top/middle/bottom. No margin is provided, so text will be right against the outer edges of a button (although left and right can be adjusted by manually padding with spaces).
Only one font style is available on the TSU7000: “Pronto”. Others would need to be created as a completed button image in a bitmap editing package and then imported into ProntoProEdit NG as a bitmap file.
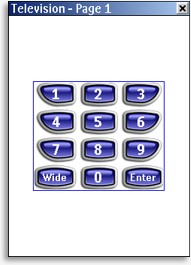
A group of objects. |
Duplicating and collating made easy.
One of the most confusing aspects in previous versions of ProntoProEdit was how objects were grouped together – grouping wasn’t so much a feature as a side effect. I’m pleased that ProntoProEdit NG has greatly improved how this works: merely select the objects you want to group and hit the “Group Objects” button. Grouping multiple objects together permits the moving and duplication of the cluster as a single object. It’s even possible to group together other groups of buttons, however once a button has been grouped it is not editable until first ungrouped.
New to ProntoProEdit NG are more advanced alignment capabilities. Now, not only can buttons be automatically centered horizontally and vertically on a page, but they can be aligned to one another or distributed uniformly. Select several objects and hit the “Align Left” button to position them all on the left edge of the first object. Objects can also be aligned to the right, center, top, middle and bottom, and can be spaced evenly horizontally or vertically. This is an extremely practical addition!
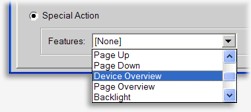
Different special actions. |
As I mentioned earlier, buttons can be easily copied by holding down the [CTRL] key while dragging to a new position on any visible page. There are likewise other useful keyboard shortcuts for transferring the images and text properties from one button to another, or just the action list, or creating a link to a button. Previously, copying images or actions from one button to another was hit-and-miss... due to a lack of visual indicators or operational consistency, it was impossible to tell with any confidence which button would actually change. Philips has greatly improved this in ProntoProEdit NG v2.0 by clearly highlighting the button that will receive the new material. Kudos!
Snapping to attention.
ProntoProEdit NG includes two basic visual aids for helping users position their objects. An on-screen grid can be toggled on or off and can be made “snap to” so that objects cling to each line. Grids are set by how many rows and columns of dots there will be. So, if you’re looking for a grid with 10 by 10 pixel spacing, you’ll need to enter 23 columns by 31 rows.
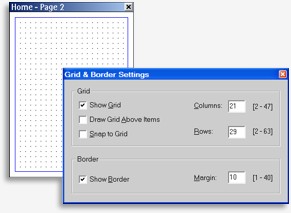
Grid & border options. |
The second layout aid is a border, which draws a blue box around the edges of the page. A border can be specified from 1 to 40 pixels inside the page, and the snap-to grid will only be drawn inside of those dimensions. This is apparently to help users keep buttons away from the screen edge where they may be difficult to press, but I don’t recall that being a real issue in the past. Math skills can also be helpful, since adjusting the border size compresses the grid inside that space – so if a 10 pixel border is specified and a grid with 10 pixel spacing is desired, you’ll need 21 columns by 29 rows. For a 10 pixel grid with an 8 pixel border... well, don’t go there.
In spite of these well intentioned aids, the most practical layout tool for power users is still the button position coordinate display in the status bar. Sometimes simple is best!
| 


