|
...Continued from Page 14.
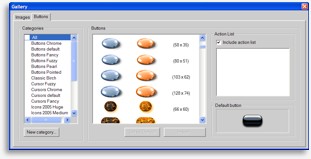
The main “Images” section holds individual graphic images that are only accessible from a button or frame’s “Properties” screen. The “Buttons” section stores assembled buttons complete with normal and pressed images and default commands. Simply drag and drop buttons from the gallery onto a page. Galleries can be saved to disk, exported, or merged together. Individual bitmaps are imported into the gallery from normal BMP, JPG or PNG files stored on the PC’s hard disk, while buttons are extracted whole from the active PCF file.
While the gallery redesign was meant to make it more useful and efficient, I didn’t find that to be the case for ProntoEdit NG and further improvements are minimal in ProntoProEdit NG. First, it’s slow: it takes at least 25 seconds to load the first time after starting the software (fortunately it’s instant on subsequent reloads). Second, it’s not really any easier: by far the quickest way to create a new button is to find one already in the layout, click it, hold the [CTRL] key on the keyboard and drag it to a new location. Voila, instant duplication. Third, it’s of limited use: if you’re looking for something with new bitmaps, it’s not possible to assemble a completed button solely in the gallery. It’s generally much faster to take an existing button and assign new image files off disk with the normal Properties screen, skipping the gallery’s “Image” section altogether.
An example of how screens can be customized with PPENG. |
What I found handy about the original gallery style, basic as it was, is that it was possible to store preassembled groups of buttons: for instance an entire DVD transport button group with 15 buttons and panels meticulously placed, or a 10-digit numerical keypad ready-to-go. The new gallery simply doesn’t allow groups of buttons, so when designing my TSU7000’s interface I completely ignored it and instead opted to create an old style gallery in the form of a hidden device.
Bitmaps that aren’t quite all there...
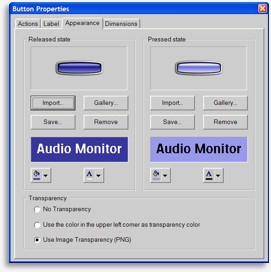
Buttons and panels can be any size from 1 by 1 pixel up to the full area of the screen. An object’s dimensions are determined by the size of the assigned bitmaps (although in the case of plain objects without bitmaps it’s possible to enter an exact dimension manually). ProntoProEdit NG supports custom bitmaps in Windows BMP, JPG and PNG formats, up to 24-bit (16.7 million) color depth (although they will be reduced to 16-bit 65,000 colors for display on the remote). Buttons have two states: normal, and pressed. If no pressed image exists, the remote will automatically reverse the regular bitmap during normal use. Buttons also have four possible color settings: background and text, for both pressed and released states. The background color setting is effectively ignored if bitmaps have been attached.
Image transparencies first made an appearance on the TSU3000 with the Windows BMP format, where one specific color could be chosen as invisible, allowing the background behind that section of the bitmap to show through. The TSU7000 supports this as well, but now adds a much more versatile transparency option in the form of PNG files with an alpha channel.
Alpha channels, which are an integral part of the lossless PNG format, work by indicating that certain areas of a bitmap should be transparent, either partially or fully. For example, if you had a solid black bitmap you could indicate in your favorite bitmap editing software that the right half of it should be 50% transparent. When you load that image into ProntoProEdit NG and place it over a white background, the left half will appear solid black while the right half will be grey. If you change the page’s background color to yellow, the right half will automatically become a dark yellow. If you instead change the background to a photo of your dog, Fido will continue to show through.
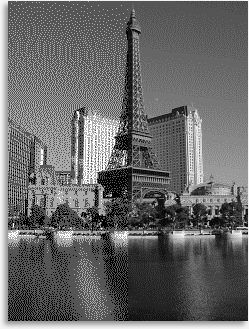 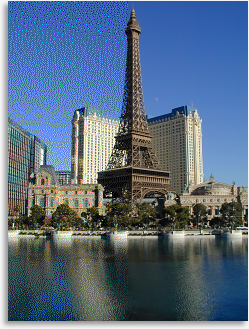
Split-screen comparisons of different Pronto models’ color capabilities. The black-and-white image on the left demonstrates the 4-shade TSU2000 (left half) and 16-shade TSU3000 (right half), while the color image on the right displays the 256-color TSU6000 (left half) and 65,000-color TSU7000 (right half). |
|