|
...Continued from Page 12.
Getting to know you...
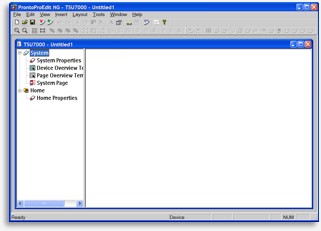
The first two items shown on a new file’s device tree are “System” and “Home”. These are automatically created with every file and cannot be deleted. Double-clicking on one of these (or clicking the little “plus” sign) expands the item to show a “Properties” line and all contained pages.
The top System device stores remote defaults and offers file-specific items such as write protection (to prevent changes on the remote) and a notation box. Double-clicking on the “System Properties” line opens up a rather large window with two tabs, the most important one labelled “Hard Buttons”. Any commands assigned to the hard buttons in this section, such as [Volume] or [Channel], are automatically replicated to every other region on the remote, unless superseded by something else. Think of it as a punchthrough.
The three pages available under System are “Device Overview”, “Page Overview” and “System Page”. The first two correspond to the two overview screens discussed earlier in this review – one to list all devices and one for all pages under a device. These pages can be customized using any desired style, but should be kept fairly simple. The final item, the System Page, is where the remote-wide graphical user interface is stored: items on this page will automatically be shown on all others. Objects stored here include the standard row of buttons at the top, the time, remaining battery level, IR transmission icon and four label positions for the lower hard buttons.
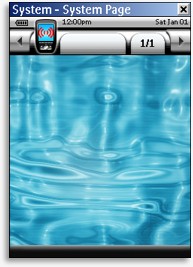
The default system page. |
Unlike older models of the Pronto where the entire user interface is hard-coded, the TSU7000 can have all elements moved or even deleted from view, freeing additional useable space. The aforementioned “Object” toolbox’s sole purpose seems to be for adjusting this section, as 14 of its buttons are dedicated to enabling and disabling user interface elements – something that can only be done on the System Page and likely only once!
No margins on this page!
The ProntoPro NG’s screen resolution is 240 pixels wide by 320 pixels high, the same as its predecessor. Formerly only a portion of the screen in the middle could be edited – for the TSU6000 this was barely two-thirds of the display at 240 by 219 pixels. The Marantz RC9200 enlarged the editable portion to 240 by 270 pixels – roughly 84% of the screen – but the TSU7000 and TSU3000 are the first Prontos to allow absolute full-screen editing (leaving the default interface intact results in a 240 by 253 pixel area).
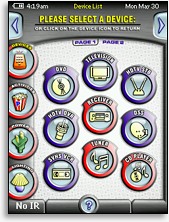 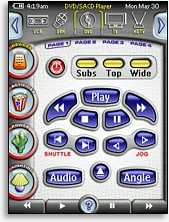
An example of how screens can be customized with PPENG. |
For those up to creating an entirely new user interface, ProntoProEdit NG now allows most system elements to be easily customized with new images – something that could previously only be done by “hacking” the file. Still, a few items cannot be changed, such as the battery level and transmission icons. If you’re up to delving into the PCF file structure it is in fact possible to change the images associated with these objects, but until Philips makes this easier to do most users will simply opt to live with the defaults.
The only fixed device, “Home”, doesn’t serve a particularly distinctive purpose on the TSU7000 – Philips’ default layout doesn’t even use it. Many users do indeed like home pages, but the fact is with the TSU7000’s two-level architecture, device and page (previously the ProntoPro had three levels: section, device and page), any normal device could have been renamed “Home” and achieved the same objective. But in this case, it gets a special icon on the device tree and a dedicated “Home” special function.
|