|
...Continued from Page 16.
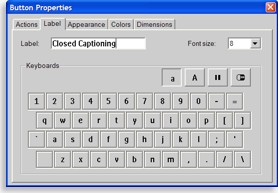
Button labelling. |
Textual feelings.
Labelling buttons is very easy in PENG, simply because a traditional computer keyboard is used. The same characters and symbols are available here as on the remote – even divided into the same four miniature on-screen keyboards. With ProntoEdit it’s possible to change a button’s font size to 10, 12, 14 or 16 point, or choose “none” to identify a bitmap-labelled button within the software without displaying that label on the remote (required for aliasing). Text colors can be changed to one of 16 greyshades, for both normal and pressed button states.
What isn’t possible is adding more than one line of text to a button, making use of more than one font size at a time, or positioning the text any place other than “dead center” (although analyzing the raw XML code reveals that Philips may be planning additional options in the future). The old trick of padding the beginning or end of a label to shift it horizontally doesn’t quite work here: even though this is supported on the remote, the extra spaces are discarded when the file is saved.
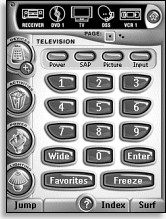 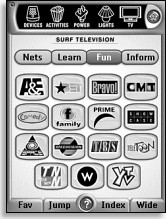
An example of how screens can be customized with PENG. |
The font sizes as specified in PENG are inaccurate when compared to how they appear on the remote’s screen: they’re all labelled 2 points larger than they are. So, for example, 10 point is really 8 point, and 16 point is really 14 point. Only one font style is available on the TSU3000: “Pronto”. Other font styles would need to be created as a completed button image in a bitmap editing package and then imported into ProntoEdit as a BMP file.
If you wish to customize the four screen-labelled hard buttons at the bottom, these are accessed under the “Device Properties” screen. No font size or color options are available here.
Duplicating and collating.
One of the most confusing aspects in previous versions of ProntoEdit was how objects were grouped together – grouping wasn’t so much a feature as a side effect. I’m pleased that ProntoEdit NG has greatly improved how this works: merely select the objects you want to group and hit the “Group Objects” button. Grouping multiple objects together permits the moving and duplication of the cluster as a single object. It’s even possible to group together other groups of buttons. However, once a button has been grouped it is not editable until first ungrouped.
Standard Windows conventions are used to select multiple objects. For example, if you have a grid of 3 by 3 buttons (for a total of 9), selecting the top left button, holding the [SHIFT] key and clicking on the bottom right button will select all buttons in-between. Similarly, performing those steps but substituting the [CTRL] key will only select those two buttons. Unlike Windows convention, it’s impossible to unselect a previously selected button by clicking on it again: the program instead unselects everything.
As I mentioned earlier, buttons can be easily copied by holding the [CTRL] key while dragging it to a new position on any open page. There are likewise other useful keyboard shortcuts. Hold [CTRL] and [ALT] and drag one button on top of another to transfer only the bitmaps. Or, hold [CTRL] and [SHIFT] to copy just the action list.
|