|
...Continued from Page 15.
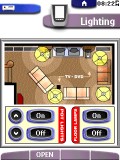 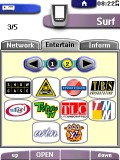
Sample screens from my redesigned interface. |
Default layouts for new macro, home or device panels can be modified by editing "macro.ccf, "home.ccf" and "device.ccf" respectively. A blank panel can be added instead of the default design by holding the [SHIFT] key while selecting the command.
Right-clicking over a device name on the tree provides options to move, cut, copy or delete a device, add a panel, add a new device, rename the device, or set one of several special functions. Those functions are "Is Template", which means the device will only be accessible from the "Add new device" option on the basic remote; "Is Read Only", meaning that it can't be changed on the remote; "Has Separator", to draw a line above the device on the Device Menu; and "Needs Programming", a new option that is used to tell the remote that the device needs a preprogrammed code set. Devices, or "Groups" under the Macro section feature similar functions and design considerations (indeed most users either ignore the whole Macro section or use it for different, non-macro purposes), however it's special options include the ability to make a group specifically for timers. That way, any blank buttons you add under such a group will default to a timer, instead of a macro, when it's edited on the remote.
Right-clicking over a panel name presents similar options, except here the only special function is "Is Hidden". That moniker is actually somewhat of a misnomer as it only prevents the remote from scrolling that panel. If an entire device is made up of such panels, the first panel will still be displayed when the device is selected, but no scroll icons will appear on the side of the screen to get to other panels - that functionality must be designed into your custom layout using page jumps. For close-up work, each panel can be zoomed up to four times its original size. In addition, custom layout grids can be created and displayed at any time, along with a selectable "snap-to" option.
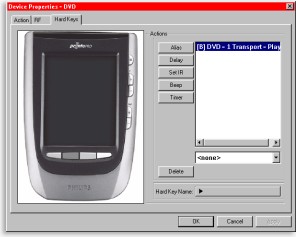
Hard Button Properties |
The biggest change in ProntoProEdit's interface from ProntoEdit v2.0 is the "Device Properties" screen. Instead of each hard button having a separate tab - 7 were featured for the TSU2000, the ProntoPro would have required 9 - all are now accessed from one. The new screen displays a photo of the remote on the left. Clicking on one of its hard buttons changes the right half of the window to display the action list and label for that button. Though I don't feel this new design is quite the answer we've been looking for - the photo takes up far too much space, while the hard buttons themselves are small and make it difficult to tell which is currently being worked on - the change is a welcome step in the right direction.

ProntoPro Emulator |
On the same window, the "Action" tab is used to add commands to a device that will execute whenever it is selected. This is great for automatically entering the proper inputs on your television and receiver - no more complaints that "the sound doesn't match the picture!" Naturally, this generally requires "discrete" codes - codes that immediately jump to the specified input, instead of rotational "toggle" codes - which is where the Pronto's user community comes in. If such codes exist, chances are they're already available or will soon be found.
Full Emulation... and more.
One of ProntoProEdit's most useful utilities is the ProntoProEmulator. Complete with a picture of the remote and operational hard buttons, the emulator uses the same program code as the real remote and will show you exactly how your configuration works - or doesn't. If you've got a ProntoPro connected to the computer (and ProntoProEdit feels like cooperating) buttons pressed on the emulator will be transmitted out the real remote. You could even try learning codes into your file through the emulator (a special mode exists where changes made in the emulator will be saved to disk).
| 


