|
...Continued from Page 2.
10 devices in simplicity.
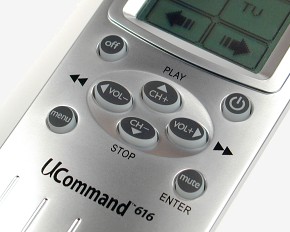
The UCommand 616 can control 10 devices – that’s 2 more than the UC-515. The default template selection is LD/VCD, Cable, VCR, DVD, Amp, TV, Tuner/Tape, CD, plus two auxiliaries. In addition, each device can hold a total of 42 buttons on four LCD screens and 7 hard buttons – 14 more buttons per device than the UC-515. Which all means that the 616 is definitely geared towards more complex systems. The operational layout of the UC-616 is simplicity itself – two Main Menu screens let you select a device. From there, two arrow buttons at the bottom of the screen allow you to flip between the four LCD pages of buttons. At the top of the screen are three icons: to the far left is a small "M" which takes you to the Macro Menu; in the middle are the first 6 characters of the custom name for your currently active device (which you can also press to return to the Main Menu); on the far right is a little "i" that takes you to an information screen showing the current date and time, plus battery level and beeper status.
To enter the Setup Menu, hold the MENU button for three seconds. The first screen allows you to set the time, configure a timer or macro, adjust button properties or set up the remote. The [UP] and [DOWN] buttons choose a menu item, [ENTER] selects, [MENU] returns to the previous screen.
Got four VCRs and no CD player? Not a problem!
The first thing to do is configure the remote to operate your particular mix of components. Since the Main Menu is fully customizable in every possible way, you can add any mix of preset device templates. Only have 4 components? No problem as you can delete any buttons you don’t need. Restoring one is as simple as a few clicks. To begin you’ll want to select the "Adjust" menu. From there choose "Main Menu", then "Relabel". You’ll be presented with the first screen of components. To adjust one, simply select it. You’ll immediately see an on-screen keyboard of 27 characters, with large "P1, P2, P3" buttons at the bottom to flip between uppercase, lowercase and number keyboards, respectively. The large arrow buttons at the bottom change cursor position.
This screen also displays a preview of what you’re typing. Depending on the button’s size, you’ll be presented with only as many letter slots as that button can hold, up to a maximum of 20 characters. Also dependent on the button’s size, a small "new line" symbol will be displayed in the appropriate position, up to a maximum of 4 lines. Since buttons are not automatically horizontally centered, you’ll need to make the most of those symbols. Text entry is remarkably fast.
Once you’ve completed the device’s label you’ll be presented with a new screen with 8 devices. This is where you select what type of device that button will control. As long as you choose the same device as the button was originally programmed for, any changes you’ve made to that setup – such as learned signals and labels – will be maintained. But if you select a new component. the whole device will be reset back to factory defaults. At the top right of the screen is a small icon that you’ll find very useful – pressing it switches between text edit and button resizing modes, the latter to be covered later.
|