|
...Continued from Page 11.

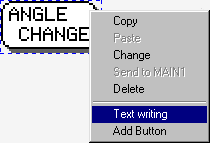
MXOP's Right-Click Menu.
|
Modifying Buttons
Most of a button’s configuration is accomplished through the right-click menu. You can copy buttons throughout the current device by selecting the right-click "Copy" option, then moving to the page you’d like it on and selecting "Paste". You cannot, however, copy a button from one device to another (exactly why is a mystery), nor can you copy or duplicate an entire page layout. If you need 12 custom keypads, you’ll have to recreate it 12 times. Other right-click options are "Change", "Delete", "Text Writing" and "Add Button".
"Change" allows you to switch a button to a new image. After choosing it the Button View "Select" button switches to a "Change" button. Find the new image you want, then press "Change" to apply. "Delete" (or the "DEL" key) obviously allows you to remove a button from view, but "Text Writing" is a little more interesting. When selected, your cursor will change to a prompt. Click anywhere on the screen – preferably over the active button – to add a text input box. Type up to 14 characters, then hit "Enter" when finished. The new line of text is assigned to that specific button and will be moved along with it. You can perform the same procedure again to add a second line of text. To switch between the small and large font sizes, press the little "S" or "L" next to the "T"ext toolbar button (which we’ll cover shortly). Combining both a large and small label on a single button can provide quite a pleasing result. You don’t need to select the font’s color, as it will automatically choose black or white depending on what is beneath it.

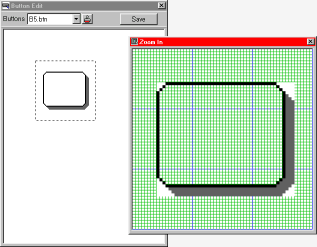
MXOP's Button Designer.
|
Customizing your button images
The "Button" menu provides three options to design, add and view custom images. The "Button Design" tool opens up a new window from which you can load, save and edit .BTN files on a pixel-level. Similar to Microsoft Paint, Button Design allows for very basic modifications with pencil, line, and hollow or filled square or circle drawing tools. A "Zoom" tool, next to the "Grid" option, opens up yet another window with a larger view of a portion of the Design window. When you’ve finished creating new artwork you can save the button to a new file – don’t worry about the filename shown at the top of the screen, the software will ask you to pick another. You can also "Select" buttons from the Button View screen and drop them into the Button Designer. The whole "custom button" concept was not actually expected to be available in the first release of this software, but with it the MX-1000 is elevated into a whole new category of "truly customizable" remote controls.

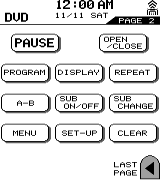
Before...
|

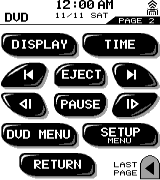
After!
|
Although a thoughtful inclusion, actually using MXOP’s Button Designer is an exercise in slow torture – its design tools are far from intuitive. Some, like the erase tool, won’t even continue to work as you hold the button down – you must click once for each tiny section erased. So, all MX-1000 owners owe a debt of gratitude to Jeff Cooper, who took it upon himself to create a utility to convert between the MX-1000’s text-based .BTN file format and the industry standard .BMP format. This adds the capability to use any popular photo-editing software package – such as Paint Shop Pro, Photoshop or Corel Photo-Paint – to create your original source material. Due to the MX-1000’s somewhat odd LCD proportions, it does not display square pixels. With an effective resolution of 160 by 240 but with 80 by 109 DPI, you must stretch any custom artwork you create vertically by 36% for it to look correct when displayed on the remote.
|
|

